Have you seen the new (I mean old) line of nail polishes by Essie that were released as “Lilly inspired” shades to match the clothing. Before you run out to ebay (who knew they were the third partner in the Lilly for Target collaboration) and spend double, please know that these are NOT new shades based on Lilly Pulitzer prints but old colors with a “Lilly for Target” paper tag attached to the bottle. Did they think no one would notice? I’ve had Borrowed and Blue for a good two years. And Golden Nuggets I bought a few months ago on clearance at Ulta for I believe $3. I feel like people are being taken advantage of with this whole Lilly + Target collaboration.  I would NOT suggest going to Poshmark or ebay and buying these nail polishes that are listed between $14 and $20 each. It would have been fun if they would have had a real selection of Lilly Pulitzer polishes. Or if they wanted to use old colors then maybe a cool Lilly printed bottle. But if you want those colors, just go to Essie.com and type in the names and they are listed as “in stock” and buyable for $8.50 each minus the Lilly for Target paper tag. I just tested that out on the Essie website. And if you really like blue, I suggest Bikini So Teeny by Essie. It’s a beautiful light blue, and in my opinion, better than Borrowed & Blue. Here are a list of the colors that you can shop for on Essie that were part of the collaboration: Forget Me Not Mesmerized Borrowed & Blue Golden Nuggets Pansey Baby’s Breathe First Timer
Tag Archives: Glitter
BOGO 50% off Target Sandals! Here are my picks…
Last year this was “the” shoe on Instagram. It sells out fast and everyone is always desperate to get a pair. It is only available online too. I have to say it lives up to the hype. They’re cuter in person, very comfortable, and I don’t find that the glitter falls off. And they’re back this year! Grab a pair before they’re sold out again!
 I love when Target has BOGO for sandals especially when I’m looking out my window and seeing mounds of snow! But it makes me hopeful that warmer weather is coming. And right now with the BOGO it is also free shipping on orders over $25. So two pairs shipped free for about $35. Can’t beat that!
Here are my picks for spring and summer sandals from Target. This first pair “the Belinda” is my favorite! It looks just like the JCrew sandal from last year that sold for about $250. I’m super excited about these!


DIY Glitter Pumpkins for Fun Fall Activity
Fall is my favorite season so most of my traditions are settled in fall time. I would say our absolute favorite activity is our yearly glitter pumpkins. This year was our 9th year. I’ve certainly done some “tweaks” to make it better each year. I saw it on Martha Stewart’s tv show in 2005, and she was just doing a simple gold glitter pumpkin. I had a 2 year old and 1 year old at the time so we got out a glass dish and tried to do a glitter craft indoors. Big mistake! I think I still was finding random glitter a year later.
Fast forward nine years and I’ve added two more kids to the mix, we now do about 20-25 glitter pumpkins with all kinds of designs and in every shade of glitter you could imagine. Every year the trick-or-treaters comment on how awesome our pumpkins are and ask me a host of questions. It’s all very simple. You need: pumpkins, elmers glue and glitter. That’s it. I always buy my glue when they’re doing the back to school sales because we typically use 4 full containers of it and maybe a couple glue sticks as well. I buy my glitter at Wal-Mart because it’s only $2.97 and you get a pretty large container of it so I can buy lots of glitter and not stress about my 3 year old dumping way more then she needs onto the driveway. I found a bunch of the mini glitter tubes in Target clearance bin for 20 cents this year so that was nice.
Step One: Glitter pumpkin day is usually around the first or second weekend in October, but it must be on a good day. No rain. We sit in the driveway where we can be as messy as we want and the glitter can be blown away later with a leaf blower.
Step Two: If you are doing an all over glitter then apply Elmers and spread with a brush or your finger. Some years I have brushes and this year I forgot. Oh well…maybe I’ll remember for our 10th year 🙂 But apply a good coat but not so thick it runs down the sides because then your glitter will shift.

Step Three: Pick it up by the steam and rotate a good glittering all over and let it dry. That’s it. So simple and fun. Now you have a pumpkin that looks like an apple. We also do green steams too.

In the Target clearance bin I also found tubes of glitter glue for 20 cents so I did a nod to Chanel for my couture pumpkin. Lol


Some of our finished pumpkins. This year we did a chevron too – used a glue stick to draw on the chevron and then added glitter per stripe. They’re not perfect but I don’t do crafts with the purpose of it coming out flawless. I like fun and easy. If I’ve spending too much time for it to be perfect then it’s not fun. And really I want my kids to have fun and I don’t tell them how it should look. Tip: make sure your pumpkins are on a covered porch away from direct rain or the glitter will wash off in places.
DIY – How to make your own nail tape
I’ve been seeing a lot of nail art involving nail tape strips, but they can be a little pricey, especially if you want more then one color and size. So here is a tutorial on making your own nail tape! The process of making it is super easy. It’s a little tricky cutting and sticking it but nothing that would be too hard at mastering. I think my next attempt will be a lot quicker. Overall, I love it and it gives me a little more options in creating nail art looks. So here are the steps:
-

- Step 1: choose your colors and paint scotch tape with two coats. I used a flat silver and sparkly silver.
-

- Step 2: Paint your nails and allow them to dry fully. It’s impossible to apply the strips with them sticky, you’ll just destroy your nails.
-

- Step 3: Make sure you give it a good 30 minutes to dry before you cut. Width is a matter of preference. I did a couple different ones. Be careful not to apply and then try to move it. One stick and done.
-
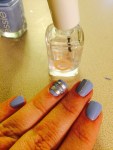
- Step 4: Apply top coat to seal your nail tape.
-

- The finished look!
