Rocksbox Monthly Jewelry Subscription

Rocksbox is this great jewelry service that will send you three pieces of jewelry based on a style survey you complete. Each box is curated specifically towards you and what you like to wear. You wear them, return them when you’re done and they’ll send you three more pieces out. You also have your own personal wishlist that you can add items to, so they know exactly what you’d like to try out. I’ve kept boxes they’ve sent me for four weeks and some four days. I’ve received some amazing Kendra Scott pieces in my Rocksbox at discount prices. So if you like what you receive they will sell it to you at a discounted price. They also give you a $10 credit each month to go towards the jewelry you want to keep in addition to the discount. So keep it or wear it and return it.

I think the best thing is that it gives you a chance to change up your jewelry without committing to buying it. Sometimes I buy jewelry thinking it’s a great piece and wear it a few times and then I’m bored and it never really sees daylight again. So this way I can wear my Rocksbox jewelry a week or whatever and then send it back for a whole different set of options.

Rocksbox has been kind enough to extend a free month to all my readers! Just use code “cocoforbeautyxoxo” to get a free month of jewelry.

Here are a few pictures of boxes I’ve received and also how I styled a few of the pieces.

image

imageThis Lauren Hope necklace was such a beautiful color! I didn’t keep it but it was fun to “borrow” it for a couple of weeks.

imageimageThis CC Skye necklace I kept and I wear it almost daily. CC Skye is this amazing edgy jewelry designer. I have a pair of her earrings on my wishlist right now.

They try to taper each box so the pieces work together. In this picture I was sent the earrings, necklace and cuff in one box and it all worked beautifully together. This Lauren Hope cuff I ended up keeping.

rocksbox rocksbox1 rocksbox2

My Adventures in Color Running

imageSAVE $5 OFF REGISTRATION BY USING CODE HOUSTON1— A few years ago a friend of mine told me about this 5k where you get color thrown at you. I was deeply into doing 5k’s at the time trying to improve my time (trust and believe, I’m no hardcore runner but I was trying). I was used to the traditional, pay your $25, here’s your t-shirt, here’s your number, there’s the start line, now GO! You try to run as fast as you can, or walk as fast as you can, they tap you in at the end, give you a time and hope it’s better than your last one. The most adventurous I had come to a 5K was a Halloween themed one so you wore a costume as you ran. The idea of being doused in a rainbow while running? YEEEESSSSS! Then a month later I found out that for the first time The Color Run was coming to Rochester, NY. I participated in it twice in New York and this year it’s coming to Houston in October.

So here are my adventures in Color Running!

image
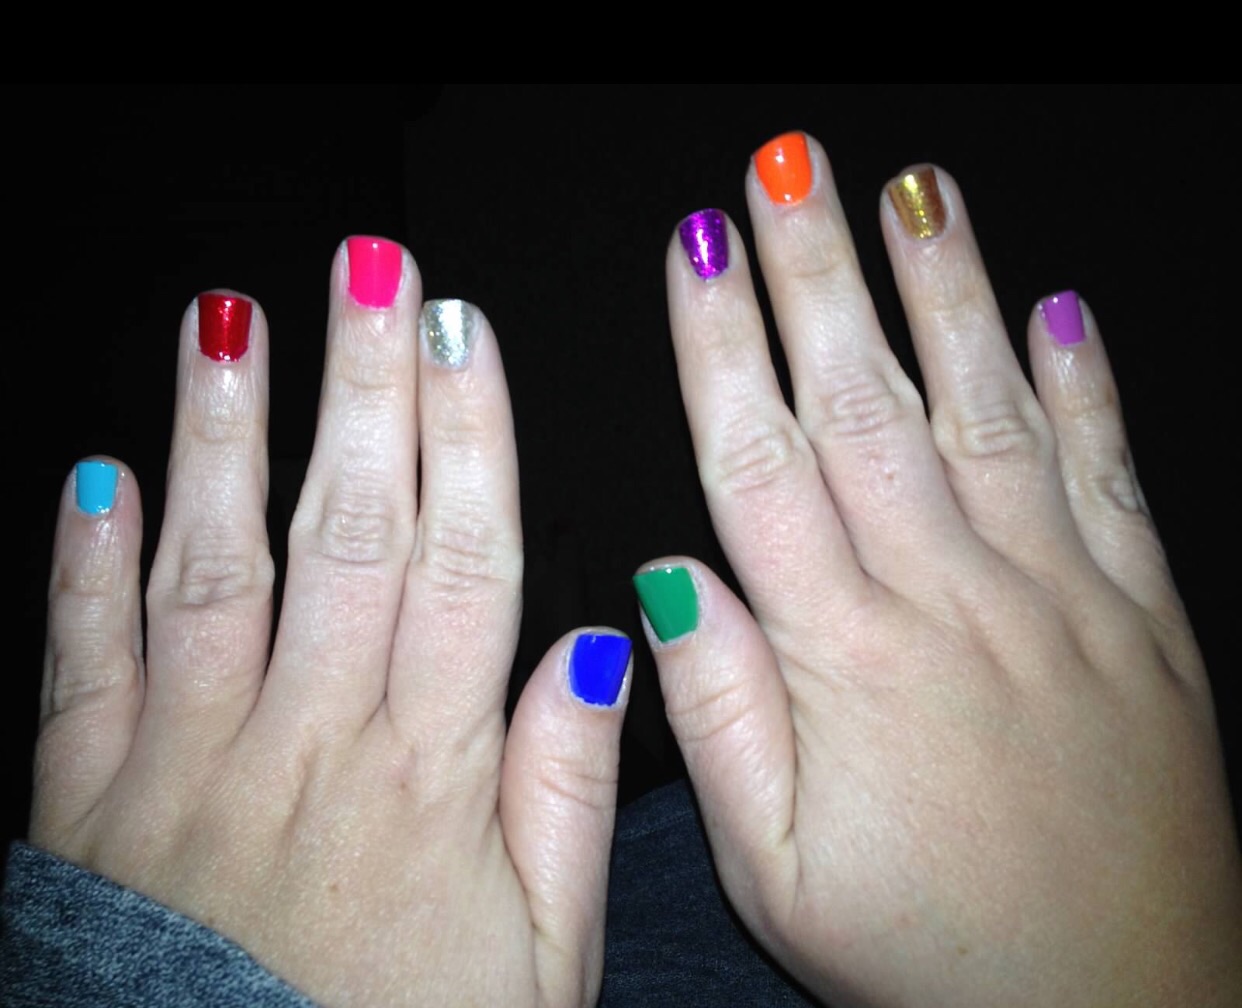
Kids are welcomed and encouraged on the race! Which I think is awesome. I’ve always done the race with my daughter. The first time she did it she was 9 years old. But I see much younger kids running it or sitting in strollers while their parents push them. This is not an ideal choice. If you’re covered in powder, so is that stroller. I wouldn’t even want to tackle cleaning a stroller after the race or putting that nasty thing in my car. Lol! One of my favorite pre-Color Run activities is doing a rainbow mani. So each nail has a different color.

imageThe day before the race you are allowed to come and pick up your packet with all your items in it. You can pick them up on the day of the race but it’s better to have everything done the day before. One of the items is tattoos, so it’s easier to put those on at home before you leave.

image
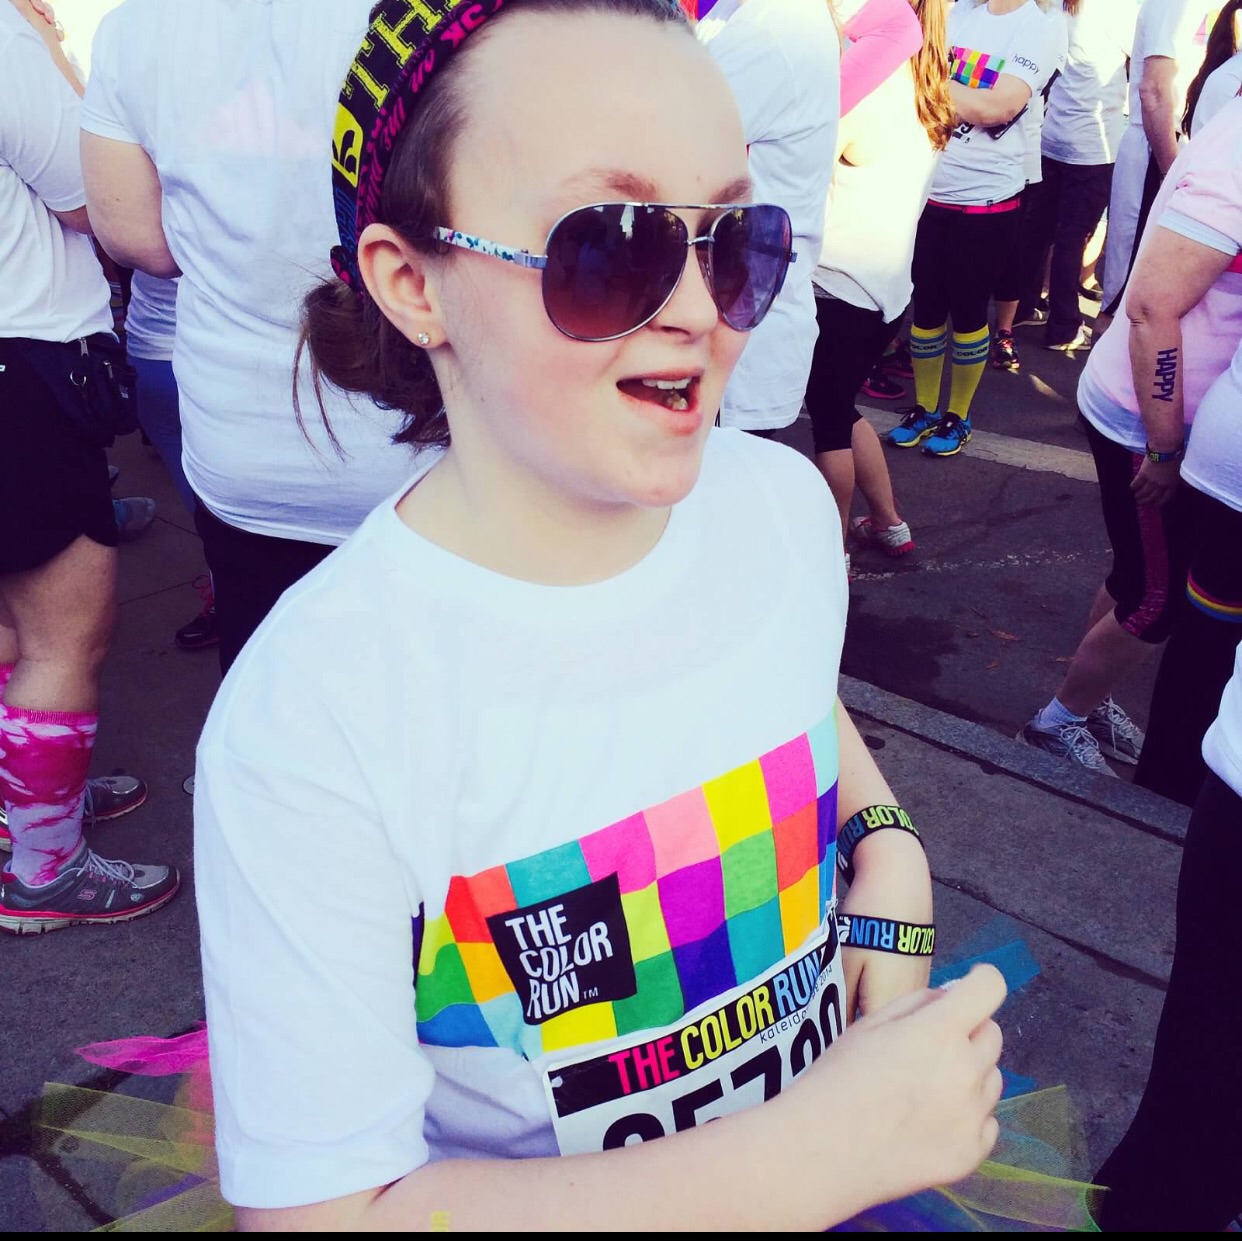
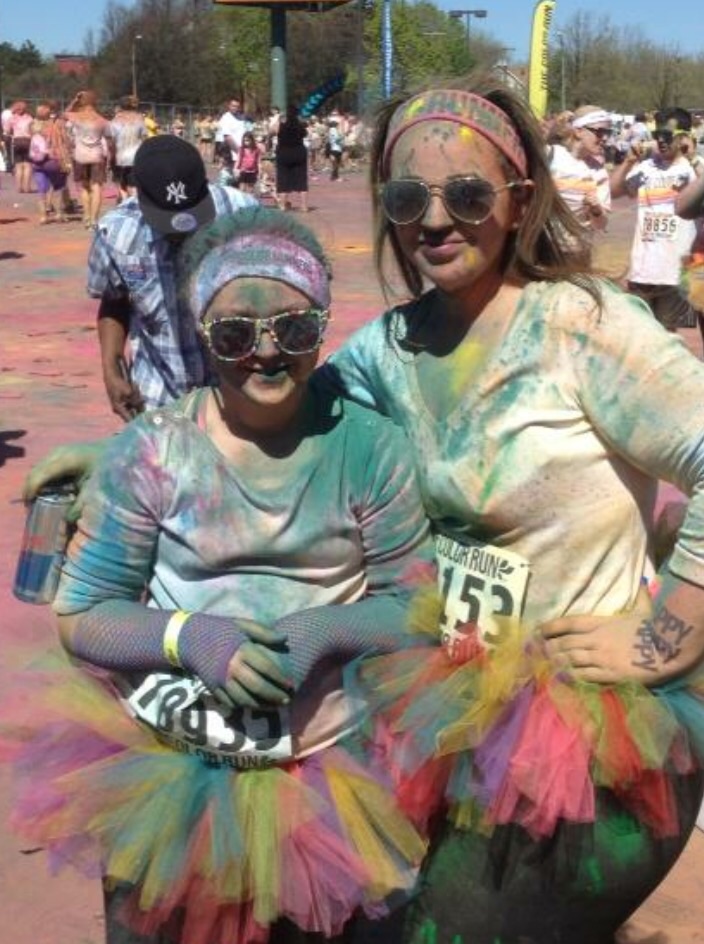
Costumes are also welcome for the race. I’ve seen people dressed as unicorns and Elvis. The most popular is the tutu. Color Run also sells tutus but I like making my own. The Color Run is the most expensive 5k I’ve ever done. It’s double the price of most 5ks. But it’s worth it. You get a large bag of swag for the race – you get a very cute, soft t-shirt and that’s what most people wear for the race. It is the cutest 5k shirt I’ve ever seen and its not the scratchy cotton shirt other races usually give out. You also get a cotton headband, a number, tattoos, a rubber wristband, and your color packet for the end of the race. I like wearing a long sleeve shirt because it’s less mess to scrub off my arms later on. I also buy the Color Run bandanas because they’re super cute. But also it’s nice to cover the hair line because powder at the scalp is not fun scrubbing out later.

imageAt my first Color Run race they gave you your powder packet when you picked up your shirt and number. The problem with that was you had to then carry it around and have it through the race.

imageIt also made people want to open it before the end. The concept was you have it, do the race, and then at the finish line throw it. The second year they just passed them out at the finish line…good idea. They’ve also added in medals to everyone that cross the finishing line. That’s cute, especially for all the kids. Unlike other 5k’s there is no timing, you don’t know your final time unless you’re using an app on your phone to track your distance and pace (which is what I do).

The race starts at 8am, people are lining up about 15 minutes before. If you don’t want to stand and wait then you want to be as close to the front as possible, because here’s how it’s different. On a normal 5K, the horn sounds and every goes. Not at the Color Run. They allow people to go in waves, like groups of 100 and then 3 minutes goes by and another wave is let go.

In Houston, they are now allowing a “runner wave” so if you’re into running the whole thing, you get to go first and then all the “walkers or run/walkers” go in at additional waves. The reason is so that not everyone is clustered together throughout the race and through the color stations. The first time I waited 45 minutes to finally “go” and I hated it. The next year I was in the second wave so didn’t have to wait at all. They have DJs gearing up the crowd waiting to start and they throw free Color Run swag into the crowd.

imageThe Color Run has “color stations” throughout the race – usually about 5 different color stations along the way.

image

imageYou enter that color zone to have about 5-10 people throwing color at you. You can opt to stay in the middle more and run through for less color, or basically, stop, spin around, stand there and welcome to be covered in it. I’ve seen some people walk along the outsides of the color station so they don’t get colored. I’m not sure why you would do that, but I’ve seen it be done. It seems a little like baby powder and it will make you cough a little. I used my bandana to cover my face sometimes. I’m told it’s organic plant powder so not dangerous to inhale.

imageimageI highly recommend doing the race with friends. If you have a team of 4 or more it also saves money off the registration price.

imageBe careful of your cell phone. Some people put it in a plastic bag to save it from the powder but then you can’t take pictures along the way. My phone has been covered in the powder each time and nothing bad happened to it.

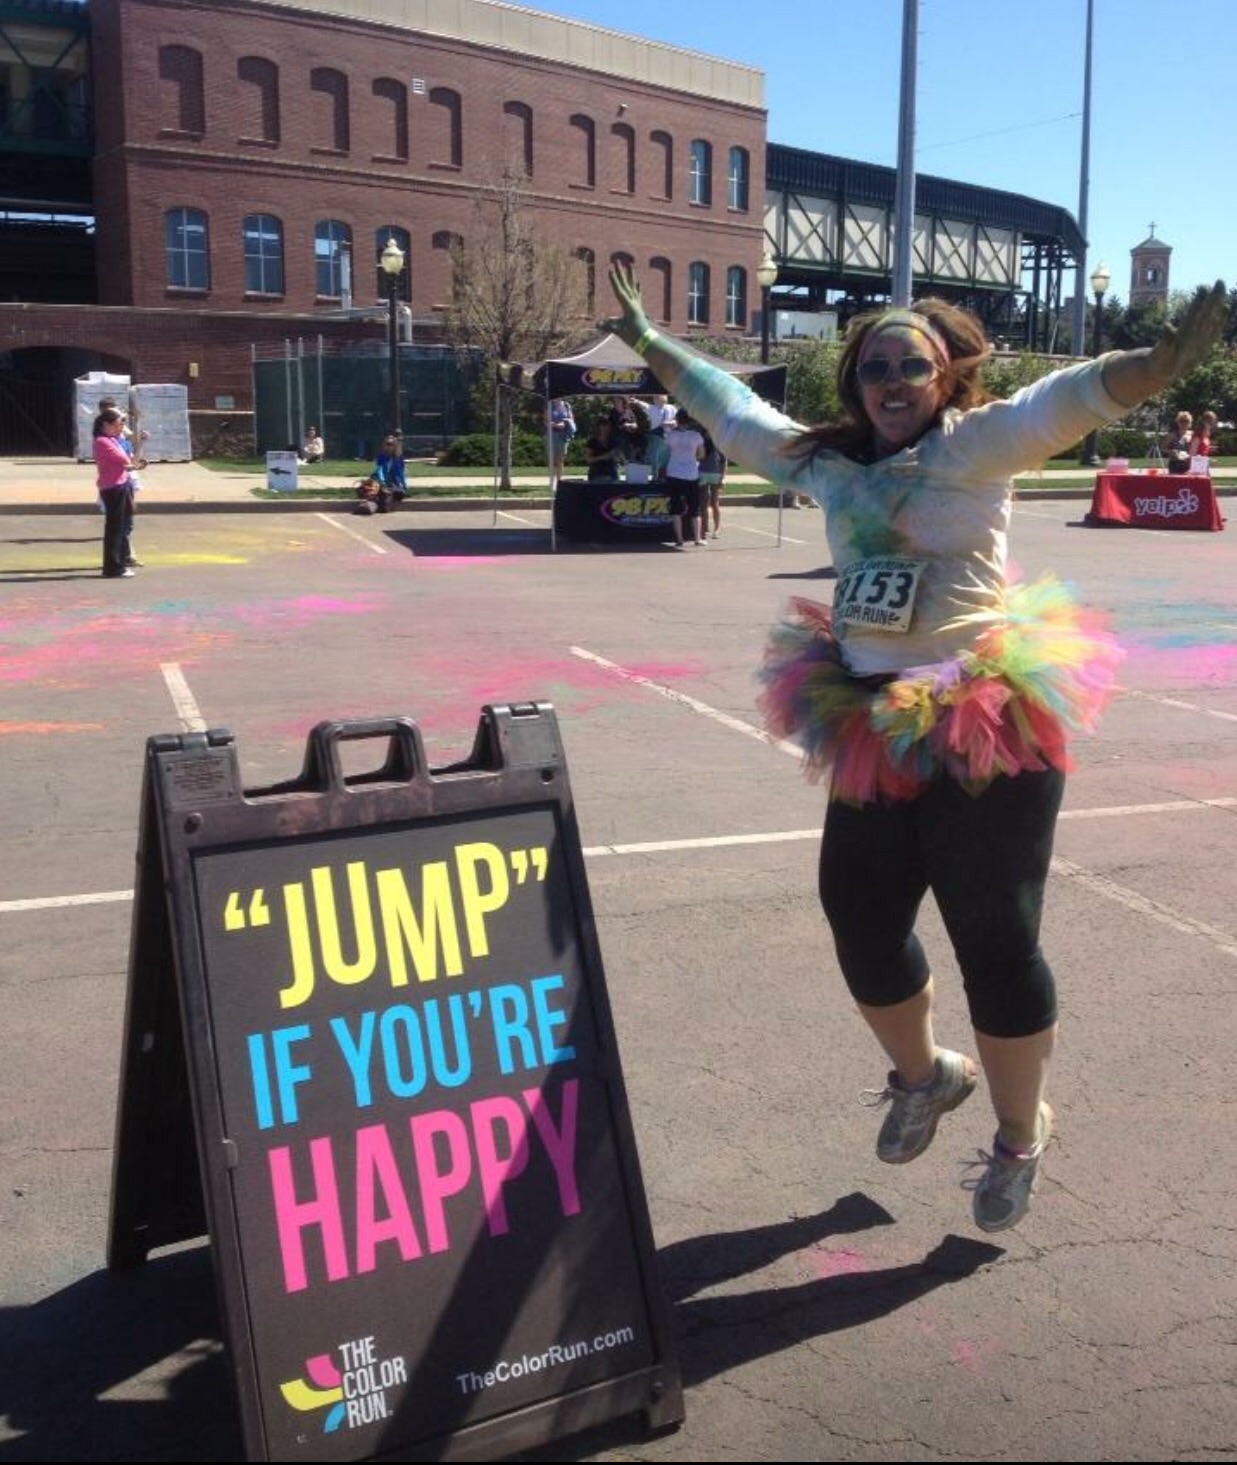
The Color Run has some amazing photo stops. They have signs at the start of the race and along the race that you can’t help posing in front of. They do have professional photographers that take pictures before, after and during the race. You can search your race number (don’t lose your bib) afterwards and see if they caught you. They usually get everyone at least once. And then you can purchase those pictures.

imageimageThere’s almost a euphoric effect that comes with doing the Color Run. It’s just FUN. I’ve enjoyed it with my daughter every year, and I want to bring my younger daughter who’s 6 this year to do it. I highly suggest covering your car seats for the drive home. That powder goes everywhere! Also having baby wipes in the car is nice for hands and faces and they’re disposable.

Do you want someone who looks like this climbing in your car for a ride home?? I think not. Trash bags, towels are great seat coverings.

imageJust be prepared that when you come home, no one wants to let you in the house! Lol

imageIt is not the easiest to get off. There are definitely some scrubbing involved. I usually wash my hair a couple of times. And if it’s concentrated in the scalp, you might need another wash. And be prepared to sneeze a rainbow for about 12-18 hours later.

But is it worth it? Absolutely! The Color Run is the most expensive 5K I’ve ever done and worth every penny. Kids are welcome. Friend teams are fun. There’s no stress in running or being left behind because you’re a walker. Most people are walking. And if you’re like me, you run some and walk some. Have fun! Stop and take some funny pictures! And just laugh! It’s worth it just for the two hours of laughter.

imageimage

Cost Saving Tips for a Disney World Vacation – For a Family of 6!

Disney World is expensive, like really, really expensive. But I’ve learned a LOT of tips and tricks over the years to make it affordable. We have four children and we’ve been able to take them every year for four years. I recently decided to start a DISNEY category to my blog so I can share some of the tips that I’ve gathered through the years, and also share some of the special events we’ve done and what it was like, so check back.

So the first thing I want to share is some of my tips and tricks for saving money.

disneybudget1. This is going to be an obvious one that I’m sure you’ve heard of before but Undercovertourist.com is a great place to get your Disney World tickets. You can save a little bit of money versus buying them at Disneyworld.com or at the gate. And I would suggest you do that as soon as possible. I buy mine usually 8-10 months in advance because you never know when Disney will do a ticket increase so it’s best to get them before that could potentially happen.

2. We ALWAYS stay off Disney property. It is way cheaper and so much better! We usually stay either at the Sheraton Vistana Resort or the Sheraton Vistana Villages. They are the same except about a 1-2 miles apart and sometimes the Villages is a little cheaper. I pay $150 a night for a 2 bedroom villa. It has a washer/dryer, full kitchen, living room, dining room, two bathrooms, whirlpool tub and a great patio that overlooks a fountain. So after an exhausting day at Disney, we put the kids to bed, take a soak in the whirlpool tub and have a glass of wine on the patio. So it is a family vacation but with great moments of relaxing time as parents. I don’t think we’d enjoy our trip quite as much if we were in one of those “family” rooms at Disney with a couple of beds and a pull out all bunked together. I like being able to go into a bedroom and shut the door. We are staying at a new resort this year that is three bedrooms and allows dogs and it’s $160 a night. I’ll do a separate blog about the resort because I have a lot of tips of tricks for saving money on that. And also great pictures of the room and resort.

3. Costumes – little girls LOVE dressing up in costume at the parks and I usually have a whole suitcase dedicated to costumes. My two youngest are 4 and 6 and they dress up as a different character every day we’re there. Never, ever, ever, ever buy costumes at Disney World. They cost about $80-125 just for the dress, no accessories. It is ridiculous. You can buy the same princess dress on disneystore.com and shop for them when they’re on sale. I usually scoop up a bunch right after Halloween when they’re 40% off but they also have them at other parts of the year for 40% as well. So you can get that beautiful Cinderella dress for $30 versus $100. I like the Disney Store costumes over the ones they sell at Target or Wal-Mart. I just feel like the Disney Store ones are really good quality and wash well. They hold up for lots of wear. This dress was a sale Cinderella dress and I even got her the ring and shoes.

476212900023. Bibbidy Bobbity Bootique – This a little girl’s dream to have her hair and makeup done. They offer packages for $300+ to get the dress and makeup and everything done. BUT if you buy the dress like I said above then you can bring that in and she can change into that and have her hair, makeup and nails painted for $55. They give you a cute little backpack too for that price. For $55 it is totally worth it. You get everything you get with the $300 package minus the dress. We took our then 4 year old on the day of her birthday and you get the birthday sash and button all included in the $55 which makes some incredible pictures.

IMG_1566

476212900004. Park treats – I go to the Dollar Store and buy packages of Disney Princess ring pops and lollipops for $1 for a package of 5. They even had Frozen ones last time. I pack them and load them into my bag so when we’re at the park, I can pull out a lollipop or ring pop and they feel like they’re having a disney treat instead of buying the ones in the store that sell for $3 EACH.

5. Disney shirts – I’ll do a whole other blog post about that. But simply put, you can search Etsy for Disney decals that are iron on with names for $4-5 each and then iron them on a cheap shirt and you have your shirts. It’s totally inexpensive versus trying to have them made. I’ve made them every time and it’s not expensive. I’ll share photos of that later. We have done photos not in shirts and it just doesn’t look as cute. This year when we went for Halloween I used one of our photos to make Christmas cards. Put a cute little border around it and Christmas cards were done.

xmascard6. Food – since we stay off property we go to Wal-Mart and buy groceries….breakfast foods, water, drinks, snacks and pack our kitchen. Our kids have breakfast in the morning and then I load a cooler with water, soda, juice and a bag of all kinds of protein bars, goldfish, cheez-its and maybe one sweet treat. I have my little girls Disney Store cups that I buy in store or online beforehand ($4 for any character with screw on lid and straw) and I bring MIO or Kool-Aid water flavorings. Pour in my bottled water or use the water fountain, add water flavoring and they’re all set. I also bring a box of Capri-Suns. You can’t beat $1.90 for a box of 10. If you want a soda or water at Disney, $3. That’s so expensive and when you’ve got 6 people that will add up to a fortune in drinks for one day.

So that’s probably my biggest savings. DON’T WASTE YOUR MONEY ON DRINKS AT DISNEY! Bring them in a cooler and you will easily save $50+ a day!

7. Eat before you get the park. We usually stop at Golden Corral at about 11:00am and just bulk up. It’s an all you can eat buffet and they have everything, including an incredible salad bar. They have ice cream and a chocolate fountain and the kids can eat and have their ice cream and they can go to the park full. And they’re not going to ask for the expensive Disney ice cream because they just had ice cream and treats. We have tried some quick service dining at the park and I’ll do a separate post about that. There are some good affordable places I’d like to share.

IMG_16058. Drive or Fly – this really depends on where you live. We’ve done both. Living in upstate NY we drove the first time and it was 19 hours straight so we had to do it in two days. It was a looooonnng drive. We flew twice after that but it’s expensive and you have to factor in a rental car. This year we are driving because we live in Texas now so the drive is 13 hours and we can do that in a day without having to stop over. And we can save money not having to rent a car. I have rented a mini-van for $250 for 5 days and last year for $400 for 8 days. Shop expedia.com for the best prices. Make a reservation and then keep checking. I reserved at $500 and then found somewhere cheaper a couple days before our trip for $380. It seems to be cheaper the closer you get. If you drive, bring lots of electronics and your sense of humor because you’ll need it! lol

DSC057799. Buying – Now I won’t lie, we do buy stuff there. I love to get a new ornament at the ornament shop in Magic Kingdom. And I love finding cute kitchen things like a Mickey spatula. But little things like Disney princess stickers, coloring books, a disney swimsuit or shirts, I buy those beforehand and pack them as little gifts during the trip. Disney stickers and activity books I buy at the dollar store. Those are great surprises when you’re on the car ride or plane ride. Swimsuits or shirts on sale at Disneystore.com or at Target. You also can create some great Disney shirts with those $4 decals I mentioned earlier. I’ve also done Disney flip flops and sunglasses for the girls. Lots of cute little pre-Disney gift buying you can do to save a fortune so your little ones are not wanting everything they see since they already have that special gift you had packed. Last year I bought Anna and Elsa dolls for $10 and packed them and gave them right before we went to the park. They carried them around all day and didn’t ask me to buy them the same doll that was selling for $25. So think ahead and buy ahead. It will save you at least 50%.

10. Disney Pin Collecting – my two oldest have done this a couple of times. It hasn’t been something they’ve wanted to do every time but here’s a great trick if your child wants to do it. Go on amazon and buy Disney pins. You can get 12 pins for like $6. They have listings for 30 pins for $15. So depending on how many kids you have wanting to do this it can save a ton of money. They are authenticate Disney pins! Otherwise you’re paying $4-8 for ONE pin at Disney World. Amazon doesn’t have them listed specifically so you don’t know what you’re getting other than authenticate Disney pins. But who cares which ones you’re getting because they’re just trading them for better pins anyway! So save money and buy them beforehand and then have them trade them at Disney for the ones they really want! The pins on my son’s lanyard was from amazon.

MK_TSFAIRIESACHAR_708521819711. Plan Ahead! Plan Ahead! Plan Ahead! – I think I’ve probably said this a million times but if you plan ahead for things then you’re not hemorrhaging money. We have had one trip where it rained A LOT and it was miserable. Pack umbrellas and buy ponchos at the dollar store. Trust me. You don’t want to be stuck in one of those horrible rains Florida can have out of nowhere and have to either wait it out or buy the $12 crappy Disney poncho. It was definitely a lesson learned and I plan ahead in case of this now. So on one trip, me and my older two went alone late one night when the little girls were too tired to stay any longer and I had our umbrellas and ponchos in a backpack and thank god for that because we came out of an indoor ride to torrential rain. People were huddled under awnings just waiting. I covered us in our ponchos and umbrellas and we walked to the next ride. You could tell what people were thinking seeing us “Why didn’t I think of that?!”

Let me also add that I have stayed on property with my daughter a couple of years ago when she went for cheer. We stayed on property and didn’t have a car so we had to buy EVERYTHING at Disney. I hemorrhaged so much money just between the two of us and was shocked. It also confirmed how affordable you can make this trip with what I’ve learned, especially with a large family.

I’ll elaborate through other posts on dining, the bootique, the special events, Halloween, Christmas, and hotels. 🙂 Hope this helped you plan your Disney vacay! It really is the happiest place on earth!

MK_MSBRCART_7080929157

How to Score the Items You Most Want from Lilly Pulitzer

lily1

We’ve waited patiently for months and the time is here! We are mere hours away from The Lilly Pulitzer for Target launch. But how do you score those items you most covet? Here is a game plan to help you nab those must have items before they sell out.

1. If you are planning a large haul of LP (meaning you nearly want every piece) then I suggest both online AND in-store shopping. Insiders are saying it will launch online sometime between midnight and 2am central time. Stores open at 8:00am and EVERY Target WILL have LP but they will not have all pieces.

2. If you’re only doing in-store shopping then get up early and check online the pieces you most want because then you can check to see what Target will have those items by clicking the “check in store” button. Once it launches online that function will be available. Because even though all Targets will have LP, you don’t want to show up hoping for a maxi and wind up with some bobby pins.

3. If you’re shopping online, go ahead and sign in, grab a glass of wine and wait patiently for the collection to launch. When I say “Sign in” I mean actually sign in to your Target.com account. Don’t have one? Then sign up beforehand, make sure your address is current, your credit card is saved and you’re ready to go.

4. Shopping online – narrow down your MUST HAVE pieces and write them down beforehand so you can go directly to them, put them in your basket and purchase. Go back for the second round of purchases or three or four, but don’t have them sit in your cart only to disappear as soon as you’re ready to checkout because you’re still casually cruising the collection. Cruise the collection now and get ready to be quick.

5. LP for Target is supposed to be available until May 31st but we all know it will be gone quick.

6. Stores open at 8am but I suggest being there an hour before to get the items you want the most. Please be aware that unlike previous launches, all the items will not be lumped together but spread throughout the store in their appropriate area. So if you want the hammock then you should be in the outdoor section.

7. Plus Sizes will be online only.

8. Online shoppers will be limited to five of any one item.

Good luck! Have fun! And I hope you score your most coveted Lilly Pulitzer items!

Lilly Pulitzer for Target – 6 days and Counting!

Who else is getting super excited about the Lilly Pulitzer for Target launch on April 19th?! I plan on doing both online and in store shopping. Who else thinks this will “break the internet”? Lol! I’m excited for the cute little girls outfits that come in the same prints. Very southern to match with your daughters, especially in an LP print. The clutches, the straw bags for the beach, the sandals, the swimsuits, the dresses, the scarfs….it’s also going to break my bank account. I hope you all get the pieces you’re coveting. Here are some of my favorite LP for Target pieces. Good luck and happy shopping!

lp lp1 lp2 lp3 lp4 lp5 lp6 lp7 lp8 lp9 lp10 lp11 lp12 lp13 lp14 lp22 lp23 lp24 lp25 lp26 lp33 lp34

DIY Painting Wine Glasses

image

Yeah, my nails match my glass…lol! These were my New Years nails.

Here’s a super easy, fun, affordable DIY ladies, painting your own wine glasses. I own a few of those glasses you see in the stores and boutiques that sell for $20-30 each! I’ve been wanting to try this for some time and finally got around to it. I started off simple, so stay tuned for some more elaborate designs later on. I used Folk Art paint and Martha Stewart glitter paint from Michael’s that sell for about $1-2 a bottle. Using what I already had, I decided to go for metallic gold and gold glitter.

The stemless glasses I found at Target for $1 each. I like using a blunt edge paint brush because I feel like it’s easy making straight lines, but you could tape off as well. I used the end of my paint brush for polka dots.

The supplies list is super simple. Wine glass, paint and paint brush, and a paper plate.

image

Dipping the end of my paint brush into the paint and just dotting it on. I used the Metallic paint first, let it dry for about 30 minutes and then went back over each dot with the gold glitter paint.

imageimage

For the martini glass, I left it as plan metallic paint polka dots. I really like how it turned out. Simple and cute.

image

On another glass, I painted about a quarter of the bottom in metallic, allowed to dry for 30 minutes and then used the glitter. I’m sorry I don’t have a finished version. I didn’t “love” it. I think because I didn’t bring the paint up high enough and my line wasn’t as straight as it should have been. I probably was drinking wine out of another glass while doing this craft, making my lines wonky. So I blame it on the wine 😉 But I do like the glitter layered with the metallic. It creates a nice gold sparkly finish.

image

Stay tuned for more elaborate designs. I’m excited to try this again. I expected to have to cure the paint in the oven but it really is unnecessary. I always hand wash my glasses anyway otherwise they get broken. So I only recommend the oven if you put yours in the dishwasher and then it’s 350 degrees for 30 minutes to set the paint. Happy painting!

DIY Glitter Pumpkins for Fun Fall Activity

Fall is my favorite season so most of my traditions are settled in fall time. I would say our absolute favorite activity is our yearly glitter pumpkins. This year was our 9th year. I’ve certainly done some “tweaks” to make it better each year. I saw it on Martha Stewart’s tv show in 2005, and she was just doing a simple gold glitter pumpkin. I had a 2 year old and 1 year old at the time so we got out a glass dish and tried to do a glitter craft indoors. Big mistake! I think I still was finding random glitter a year later.

Fast forward nine years and I’ve added two more kids to the mix, we now do about 20-25 glitter pumpkins with all kinds of designs and in every shade of glitter you could imagine. Every year the trick-or-treaters comment on how awesome our pumpkins are and ask me a host of questions. It’s all very simple. You need: pumpkins, elmers glue and glitter. That’s it. I always buy my glue when they’re doing the back to school sales because we typically use 4 full containers of it and maybe a couple glue sticks as well. I buy my glitter at Wal-Mart because it’s only $2.97 and you get a pretty large container of it so I can buy lots of glitter and not stress about my 3 year old dumping way more then she needs onto the driveway. I found a bunch of the mini glitter tubes in Target clearance bin for 20 cents this year so that was nice.

Step One: Glitter pumpkin day is usually around the first or second weekend in October, but it must be on a good day. No rain. We sit in the driveway where we can be as messy as we want and the glitter can be blown away later with a leaf blower.

Step Two: If you are doing an all over glitter then apply Elmers and spread with a brush or your finger. Some years I have brushes and this year I forgot. Oh well…maybe I’ll remember for our 10th year 🙂 But apply a good coat but not so thick it runs down the sides because then your glitter will shift.

image

Step Three: Pick it up by the steam and rotate a good glittering all over and let it dry. That’s it. So simple and fun. Now you have a pumpkin that looks like an apple. We also do green steams too.

image

In the Target clearance bin I also found tubes of glitter glue for 20 cents so I did a nod to Chanel for my couture pumpkin. Lol

image

image

Some of our finished pumpkins. This year we did a chevron too – used a glue stick to draw on the chevron and then added glitter per stripe. They’re not perfect but I don’t do crafts with the purpose of it coming out flawless. I like fun and easy. If I’ve spending too much time for it to be perfect then it’s not fun. And really I want my kids to have fun and I don’t tell them how it should look. Tip: make sure your pumpkins are on a covered porch away from direct rain or the glitter will wash off in places.