DIY Glitter Pumpkins for Fun Fall Activity

Fall is my favorite season so most of my traditions are settled in fall time. I would say our absolute favorite activity is our yearly glitter pumpkins. This year was our 9th year. I’ve certainly done some “tweaks” to make it better each year. I saw it on Martha Stewart’s tv show in 2005, and she was just doing a simple gold glitter pumpkin. I had a 2 year old and 1 year old at the time so we got out a glass dish and tried to do a glitter craft indoors. Big mistake! I think I still was finding random glitter a year later.

Fast forward nine years and I’ve added two more kids to the mix, we now do about 20-25 glitter pumpkins with all kinds of designs and in every shade of glitter you could imagine. Every year the trick-or-treaters comment on how awesome our pumpkins are and ask me a host of questions. It’s all very simple. You need: pumpkins, elmers glue and glitter. That’s it. I always buy my glue when they’re doing the back to school sales because we typically use 4 full containers of it and maybe a couple glue sticks as well. I buy my glitter at Wal-Mart because it’s only $2.97 and you get a pretty large container of it so I can buy lots of glitter and not stress about my 3 year old dumping way more then she needs onto the driveway. I found a bunch of the mini glitter tubes in Target clearance bin for 20 cents this year so that was nice.

Step One: Glitter pumpkin day is usually around the first or second weekend in October, but it must be on a good day. No rain. We sit in the driveway where we can be as messy as we want and the glitter can be blown away later with a leaf blower.

Step Two: If you are doing an all over glitter then apply Elmers and spread with a brush or your finger. Some years I have brushes and this year I forgot. Oh well…maybe I’ll remember for our 10th year 🙂 But apply a good coat but not so thick it runs down the sides because then your glitter will shift.

image

Step Three: Pick it up by the steam and rotate a good glittering all over and let it dry. That’s it. So simple and fun. Now you have a pumpkin that looks like an apple. We also do green steams too.

image

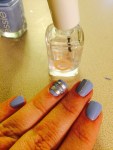
In the Target clearance bin I also found tubes of glitter glue for 20 cents so I did a nod to Chanel for my couture pumpkin. Lol

image

image

Some of our finished pumpkins. This year we did a chevron too – used a glue stick to draw on the chevron and then added glitter per stripe. They’re not perfect but I don’t do crafts with the purpose of it coming out flawless. I like fun and easy. If I’ve spending too much time for it to be perfect then it’s not fun. And really I want my kids to have fun and I don’t tell them how it should look. Tip: make sure your pumpkins are on a covered porch away from direct rain or the glitter will wash off in places.

Pumpkin Apple Cinnamon Pancakes

Keeping up with the “pumpkin everything” theme for October, here is my recipe for pumpkin Apple cinnamon pancakes. My kids just love these! And when they have sleepovers the kids staying love them too. I hear “what is in this?! It’s so good!” I make them every weekend and they’re super easy.

Here is everything I use:

image

Krusteaz is my go to pancake mix. And because I have 4 kids, I buy the super large bag from Sam’s. So for 6 people I used 4 cups of pancake mix….I know it’s a lot, but I’d rather have too many pancakes then my kids still wanting more and I’m out.

I add about 1/2 can of pumpkin, 1 tsp cinnamon, 1 cup of apple cider, 1.5 cups water, and mix. My favorite mixer is from William Sonoma. It really is the best hand mixer/whisk. The appearance  should be a hint of orange, not too much or it won’t cook all the way through and be mushy.

image

Then I pour about 1/2 cup of mix for each pancake on a griddle set at 325

imageimage

Serve warm with maple syrup..yummy! I love the fall. Have I said that? Yeah, like 100 times already. Enjoy!

Yummy Caramel Apples!

image

Happy fall y’all!!! This is my favorite time of the year! I love all things fall. Most of my recipes are centered around apples and pumpkin everything! Stay tuned for my easy cinnamon pumpkin pancakes recipe.

Here is an easy fall favorite that you can make – Caramel apples. I used Macintosh apples that we had picked from our local apple farm (but you could use whatever your favorite apple is), Wilton sticks and Brach’s caramels. One bag is good for about 6 apples. I made a dozen out of two bags. First stab each apple in the center.

image

Then you’re going to unwrap a million caramels. It’s probably the most labor intensive part is just unwrapping the candy. Add about 3 tablespoons of water to the caramels. Place a bowl inside of another boil with boiling water (aka double boiler) so that it slowly melts the caramels. Takes about 15 minutes on medium to high heat. Stir occasionally to start to blend it together.

image

Now just dip your apple and rotate it in the caramel and let it dry on wax paper. Super easy! It’s the perfect fall activity! What is your favorite fall activity or thing to make?

Sephora Frangrance IQ has launched – finding your signature scent

sophora

Sephora has now made it easier to pick a fragrance that’s best suited towards your needs, style and body complex. Personally, I’m really excited about this! I have allergies to most floral scents and it gives me a horrible headache. I also feel like a lot of perfumes just don’t fit my chemistry. I have been fortunate enough to find my signature scent which is just a classic Burberry perfume. I’ve used it now for about 7 years and it smells divine on me. I always have people asking me about my perfume and friends say they smell it now and it makes them think of me, which I love. 🙂

I think it’s important for every woman to find that perfect fragrance that makes them feel beautiful. And what girl doesn’t love smelling beautiful?

burberry

Even though I’ve found my signature scent and I don’t see it being replaced, I certainly would like to occasionally change it up and have some options. I can’t wait to try out the new Fragrance IQ at Sephora. It helps you pinpoint fragrances by asking you a series of questions and then it actually dispenses up to three fragrance samples. How awesome is that? No more trying to find a salesgirl and having to ask for a sample. And I’d rather answer a few questions and get a better range of options for me then trying to smell perfumes until I have a splitting headache. Have you found your signature scent? What is it?

New Target Beauty Box is here!

box

Target just launched a new beauty box yesterday. For just $7 you get 5 nice big deluxe sample sizes of some really great products. It Includes:

1. Elnett Extra Strong Hold Hairspray (2.2 oz): A favorite of runway stylists, this massive-hold spray adds brilliant shine and brushes out in a flash, leaving hair with a clean, satin finish.

2. Fekkai Professional Blowout Hair Refresher Dry Shampoo (1.7 oz): Revive your blowout instantly with an airy mist that absorbs dirt and oil leaving hair clean, fresh and lively.

3. Laneige BB Cushion Sample (Target Exclusive): Pat and press your way to perfect skin with revolutionary 5-in-1 cushion technology that brightens, protects, cools, covers and prevents shine.

4. NYX Jumbo Eye Pencil (.18 oz): Glide-on glam. A velvety blend of mineral oil and powder, this creamy pencil does double beauty duty as a radiant eyeshadow.

5. LOréal Colour Riche Extraordinaire Lipstick (.18 fl oz): Knockout hues meet conditioning care in a gorgeous formula infused with precious micro-oils that intensify color, smooth lips and add shine. Colors will vary.

box2

I did hear some rumblings about the fact that Target used to offer this box for free and then they charged $5 and now $7. The fact is the free one was really small samples and this is much larger in size. And you’re getting about $30 worth of product for $7, no shipping. I think it’s an incredible deal, especially when you consider an Ipsy or Birchbox probably wouldn’t include this much swag and you’re being charged $10. I say you get what you pay for and I’m more then thrilled to snag this up. There were some questions regarding the Laneige color and if you don’t get the right color you can actually exchange it in Target for a new one. So win/win! Go grab yours because I’m sure they’re going to sell out fast!

DIY: My first time chalk painting.

You’ve seen it everywhere, all over Pinterest, DIYers across the board are raving about Annie Sloan chalk paint. I was surprised to hear it has been around for 20 years in England and America has only recently gotten ahold of the chalk paint craze. I was naive in my pursuits, simply walking into a Hobby Lobby and asking for it. I was simply told “we don’t carry it”. What?! Well after a little internet research is when I saw it’s origins and how you have to purchase it through a select few boutique DIY stores across the country. It’s got a high price at $34.99 for a quart. And shipping doesn’t help either. But I really wanted to try it, so I ordered several colors and received it within 48 hours from a store called The Purple Painted Lady.

Of course I couldn’t simply just paint one solid color, I was all in. I was desperate to try to achieve this subtle multi colored finishes. In the end, I was thrilled. I had one little hiccup but it was easily fixable. I don’t usually do “finishes”. I like solid clean looking colors but I really wanted to try something different. It was hard at first to get ahold of the concept of just simple brush strokes, not heavy and full coverage, but once I saw the effect, I got the hang of it and really liked it. I will say even with the hefty price, everything where it says it covers 50% more is accurate. I was blown away by that. You can add water for washes or if you do full color it covers and covers WELL. By the time this desk was done, I think I chalk painted pretty much everything in my house. I tried it on fabric, candle sticks, frames and other furniture. I felt like for a $130 investment I was able to revamp some old furniture and give it that “boutique” look that I love. Annie Sloan chalk paint lived up to its hype which is pretty cool since few things ever do. But here’s my DIY with chalk paint. Give it a try and let me know. If you have questions, feel free to ask!

image

DIY – How to make your own nail tape

I’ve been seeing a lot of nail art involving nail tape strips, but they can be a little pricey, especially if you want more then one color and size. So here is a tutorial on making your own nail tape! The process of making it is super easy. It’s a little tricky cutting and sticking it but nothing that would be too hard at mastering. I think my next attempt will be a lot quicker. Overall, I love it and it gives me a little more options in creating nail art looks. So here are the steps:

June’s Glossybox

Oh how I love my monthly glossybox! I swear it’s like a monthly gift to myself that I don’t know what’s coming. I gently unwrap it, and get giddy excited over what it may contain. Truth be told I’ve never been let down. I’ve had other monthly beauty box subscriptions and maybe they started out okay but eventually just kept getting more and more let down. Why would anyone get excited over a pen, gum, or toothpaste in a beauty box?! Not Glossybox. High end beauty box samples on large size samples to full size?! Yes, please! I love it. I’m totally addicted and I’m never let down. Every month is a gift to myself and I believe we deserve those little surprises in life. So this is my June Glossybox and a little nail art that I did from the nail polish that was included. And, oh my god, love the nail polish! I could totally use these colors separately and I will. Very nice application and great colors! Glossybox has turned me on to Sumita. They’ve had eyeliners in their boxes before and I’m totally addicted. This box included a highlighter/eyeshadow/eyeliner pencil. Loved it! Soft golden glow, almost perfect for anyone. This month you also received a C Wonder gift certificate worth $5-500!! Love! The Rusk texturing spray is amazing and a great large sample size. If you’ve never tried Glossybox or wanna give them a shot, heres the link: http://www.glossybox.com/referal?CI=NDEzMzg=


My Cinderella Moment wearing Bel & Beau

Who doesn’t love a floor length taffeta maxi skirt?! Well certainly this girl does. Bel & Beau inspires women to dress up, but their skirts are meant for both dressing up and dressing down. I think it’s important as women and mothers to have those moments of feeling pretty – Cinderella moments, I like to call them. I attended my in-laws 50th anniversary party so comfort was also extremely important since all four of our children would be attending (ages 3 to 11). I felt really comfortable in this to be able to look put together but still be a mom of small children.

The maxi I chose came in the most beautiful fuchsia. Bel & Beau skirts are made to order, so there’s no “out of stock” or “backordered” which we all hate. And for me being a petite, I was thrilled that was an option (tall is also available). But bear in mind it generally takes two weeks for it to ship since it is made to order, so give yourself plenty of time to order in case you need it for something particular. They also have the most beautiful tulle skirts, and that’s definitely next on my list!

Black tee: JCrew – Skirt: Bel & Beau – Shoes: Target with custom jeweling (see previous post) – Clutch: Target – Cuff: Forever21 – Nail polish: Orly Grape Crush – Earrings: JCrew


DIY : Jeweling your shoes like Gap and JCrew

I ordered these heels from Target in silver and black just so I could try my hand at DIY jeweled heels. I love the versions that are sold by JCrew and Gap but they can be pretty pricey. I have a handful of broken necklaces that I’ve been saving in case the jewels might come in handy. So I took out a couple of broken JCrew knock-off necklaces and started taking the jewels off with needle nose pliers. So easy. I use E6000 glue which really is the best crafting glue on the market. I played around with the jewels until I achieved a look I liked and then glued them in place. It took maybe 10 minutes and I’ll have a fabulous pair of heels to wear tonight! I’m ready to jewel some sandals next!

Finished

Just break some jewelry and have fun creating your own jeweled shoe brooches!